冷空气拜年+零星疫情,大年初三的宝安街道行人寥寥。本着不给社区添麻烦、自觉居家观察的我,只好乖乖在家上网冲浪🏄。
 吃着火锅唱着歌,刷着油管激情视频,偶然看到Dan直播写扫雷。一顿跟随大佬@#$%^&之后,诶好像不难,那就撸起袖子码起来。
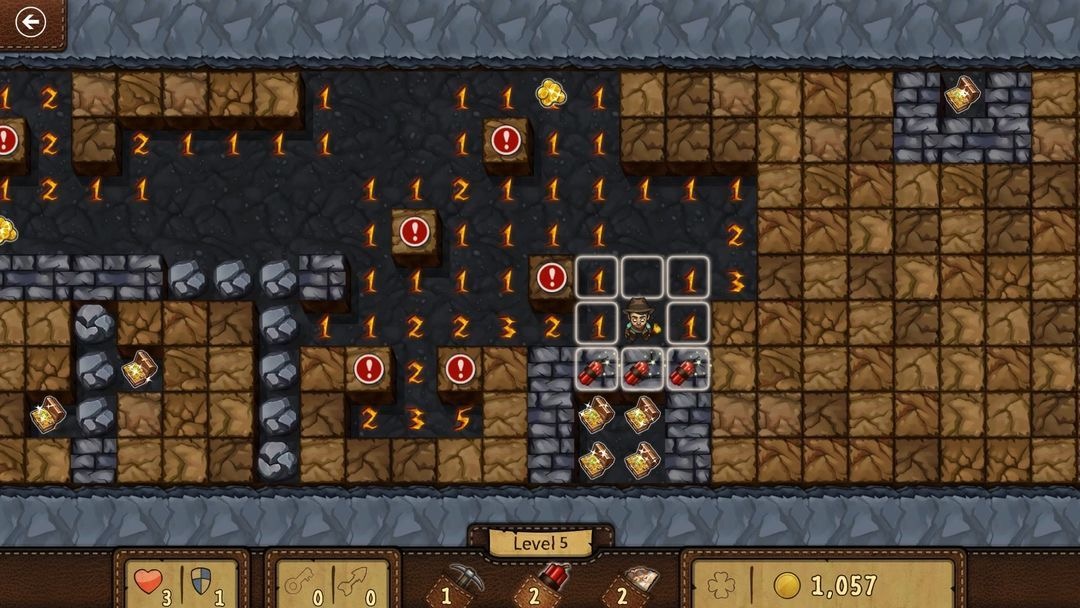
通常扫雷游戏会有这么几个区域:💣区、🚩区、数字区1-8、安全区(无雷)。
随机生成💣区、统计数字区点数
首先,我们定义几种数据类型辅助存储。其中,TMap的V也可设计成json描述,这里用两个独立的Set让逻辑清晰一些。
type TMapKey = `${ROW}-${COL}`;
type DangerNum = '1' | '2' | '3' | '4' | '5' | '6' | '7' | '8';

// 按行列生成Map
export type TMap = Map<TMapKey, 'bomb' | DangerNum | undefined>;
// 🚩标志Set
export type TFlaggedKeys = Set<TMapKey>;
// 已揭开Set
export type TRevealedKeys = Set<TMapKey>;

// or
export type TMap = Map<TMapKey, {
  value: 'bomb' | DangerNum | undefined;
  status: 'flagged' | 'open' | 'close'
}>;
然后就可以开工了。先按行列乘积平方取整生成目标💣数,再用Math.random()结合sort()对坐标点阵随机排序,接着遍历雷点的8个邻居点位,算出💣周边的数字提示。
// 伪代码
// 随机生成雷区
allKeys.sort(() => {
  const coinFlip = Math.random() > 0.5;
  return coinFlip ? 1 : -1;
});
allKeys.slice(0, Math.round(Math.sqrt(row * col)));
// 标识雷区附近数字
for (const neighborKey of getNeighbors(key)) {
  if (!map.has(neighborKey)) {
    map.set(neighborKey, 1);
  } else {
    const oldVal = map.get(neighborKey);
    if (oldVal !== 'bomb') {
      map.set(neighborKey, oldVal + 1);
    }
  }
}此处的布局算法是通过sort排序快速生成的,在超大尺寸扫雷时可以尝试优化,否则会拖慢AI计算3BV概率分布的效率,感兴趣的可以看这里。
根据map绘制四种区域
紧接着,来写一个MineBtn组件,展示基本的扫雷格子。props如下:
interface IMineBtn {
  cellKey: TMapKey;
  cellValue: 'bomb' | DangerNum | undefined;
  failedBombKey: TMapKey | ''; // 点击炸弹后赋值为对应的TMapKey
  flaggedKeys: Set<TMapKey>; // 标识为🚩的key set
  revealedKeys: Set<TMapKey>; // 揭开的key set
  onContextMenu: MouseEventHandler<HTMLButtonElement>; // 右击事件
  onClick: MouseEventHandler<HTMLButtonElement>; // 点击事件
}
判断当前格子类型,绘制对应样式:
const isBombed = cellValue === 'bomb' && !!failedBombKey; // 当前格子为雷区,且已踩雷
const isFlagged = flaggedKeys.has(cellKey);
const isRevealed = revealedKeys.has(cellKey);
// 如果为数目提示,绘制数字
if (isRevealed && Number(cellValue) >= 1) {
  textContent = cellValue;
  btnStyle.color = numColorMap.get(Number(cellValue)) || numColorMap.get(-1);
}
// 如果是炸弹,绘制炸弹
if (isBombed) {
  textContent = EmoIco.BOMB;
  if (cellKey === failedBombKey) btnStyle.backgroundColor = 'red';
}
// 如果是标志,绘制标志
if (isFlagged) textContent = EmoIco.FLAG;
// 当揭开是undefined或者炸弹时,禁用按钮
const isDisabled = isRevealed && (!(cellValue >= 1) || isBombed);
理想视图
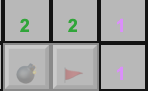
实际视图
做到这里,就可以得到基本视图了。再补充下左右点击的逻辑,即onClick和onContextMenu。给格子打🚩很简单,拦截右击行为,通过flaggedKeys增删对应key,当然已经揭开或是触雷就不能打flag了。
点击安全区,冒泡到相邻格子
点击传播是最主要的功能,上面定义的map只包括💣区和数字区,当用户点击的方格不在map中时,即点击安全区时,触发格子扩散。lc529的dfs算法大家都刷过,在这里正好用得上。
const propagateReveal = (key, visited) => {
  // 如果已打标,不记为揭开
  if (!flaggedKeys.has(key)) revealedKeys.add(key);
  visited.add(key);

  const neighborKeys = getNeighbors(key);
  if (!map.has(key)) {
    for (let neighborKey of neighborKeys) {
      if (!visited.has(neighborKey)) {
        propagateReveal(neighborKey, visited);
      }
    }
  }
}
这就做完了?等等,做自己的东西嘛,插一些优雅的需求没问题吧。提升用户体验,让demo看起来像个游戏(产品的话术我可是都学会了

点击数字,推演临近未标识的方块
如果已标注的🚩数目与数字相同,揭开未开的方块;错置🚩位置,则失败游戏结束,直接上代码:
// 比较标记位是否匹配雷区
const neighborFlaggedKeys = neighborKeys.filter(k => flaggedKeys.has(k));
const neighborBombKeys = getNeighbors(key).filter(k => map.get(k) === 'bomb');
if (neighborFlaggedKeys.length !== neighborBombKeys.length) return;
const wrongBombs = neighborBombKeys.filter(
  bombKeys => !neighborFlaggedKeys.includes(bombKeys)
);
if (wrongBombs.length > 0) {
  setFailedBombKey(wrongBombs[0])
  return;
}

// 扩展周边格子
for (let neighborKey of neighborKeys) {
  if (!visited.has(neighborKey)) {
    propagateReveal(neighborKey, visited);
  }
}
增加胜利、失败判定
需要修改几个地方:
- 记录💣数,用户标注🚩的同时,更新剩余雷数;
- 剩余💣数为0时,若🚩数+揭开方格数 = ROWS * COLS,则玩家胜利;
- failedBombKey不为空时判定失败,禁用鼠标行为,失败游戏结束。
这里还要提一点,在React中使用Set作为原子state记录key时,add、delete不会触发视图更新,需要主动forceUpdate。

体验地址放出:简易扫雷 ,pc端访问就可以体验啦!
当然,距离minesweeper online还有一定差距,像计时、移动端、自定义难度还没做,让我们给下次闲赋在家留点余地。
相关阅读: